This is my experience learning marvelous, its chaotic cause this was a chaotic learning experience in 4 weeks with no prior knowledge. A lot of this you will find better explained in many youtube videos
I started with no clear knowledge of real sewing patterns which I don't advise, after struggling with a sleeve shape I had to track down the pattern of the sleeve I was trying to achieve and then it miraculously worked as I needed for the sim so first lesson learned.
step 1) FIND A REAL LIFE SEWING PATTERN. i like suffering I guess so I was attempting to do this AI fashion as my starter project...

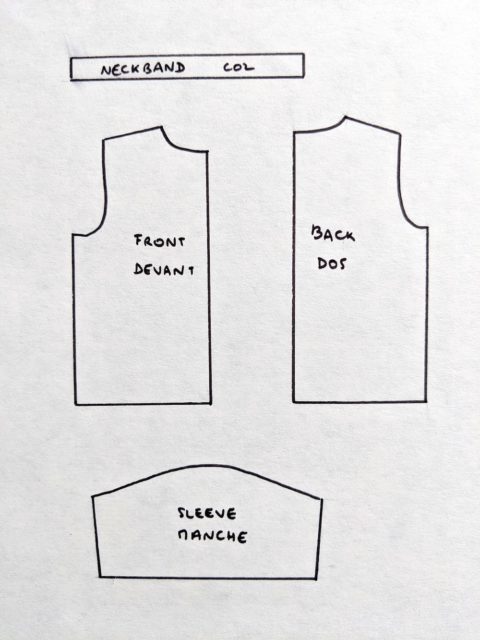
USE SOMETHING LIKE THIS INSTEAD!!!
step 2) in the software, first import a mannequin or use the default one in a new project, this is what you will be dressing and if you are trying to dress a character you modelled, IMPORT THAT ONE, otherwise the clothes you make may not fit / lay correctly
step 3) take the pattern you found of the outfit you are making and draw/trace out the shapes with the polygon drawing tools in the top of the 2d winodw which is on the left, hotkey for this is H
other hot keys are: C for adding curvature to the line, Z for editing the polygon you are on, X is for adding a point on a line, space is for playing the simulation on the 3d screen
you must sew the pattern together using the sewing tools, the segments must be as close in length as possible or it will cause wrinkles in the longer piece, if you want to only sew a little bit to an edge use the free sewing tool nad it will match the length you draw on the first piece to the second piece.
this is no bueno, it will scrunch up the bigger side
there are also notches that must match up otherwise it will be sewn in reverse/backwards


Make sure before simulating that the fabric is positioned around the avatar so when you hit play it will drape or be sewn around the character instead of falling on the floor in open space
you can also drag the simulated fabric around the mannequin and a handy tool is the show arrangement points which auto wraps the selected pattern piece around the mannequin section you select.

making shapes, sewing, seeing how they lay and trying to adjust the sewing or shapes to get it to simulate right on the avatar is the entire game of marvelous designer.
Materials also play a big part of the simulation as well as layers cause materials and those attributes affect how the clothing animates, whether its stiff and thicker or light and almost floats, with the pressure setting you can also create "puffy" outfits and pillows. That window is in the top right corner. best practice is to assign a diff color to each material so you know which is which on the outfit. I had a lot of struggle getting "solid" material for buckles. Those I would advise modelling in Maya and importing in as an object even though you CAN make them out of a pattern and material editing as I did.. with much struggle.
step 4) Once you have it how you want it, retopo inside marvelous with Y the edit topology tool and it allows you to redraw new topo on top of the pattern themselves, the patterns will be your UVs btw as long as nothing too crazy happen to them.
make sure when retopoing the points line up with the pattern pieces so you have clean edge loops through the topo of the clothing model, if they don't line up you will end up having some non manifold geo. When finished you should right click in empty space and convert all divide for more sub D and then convert all replace before exporting so the new retopo is whats being used when exporting.

Another thing I learned is that when importing into maya for things, every material you make in marvelous will be a separate UV set you will have to combine inside of maya and can take some time annoyingly.
step 5) One you have a decent simulation of what you want it to look like, export the clothing as a fbx under THIN! thick will cause a lot of extra geo you will have to clean and harder to merge everything together which you have to do anyway cause the sewing doesn't transfer sadly.
step 6) uhhh fix the mesh and texture it regularly in substance painter
In Unreal you may need to turn on two sided or double sided material so the normals arent invisible on the inside of the clothing
step 7)PRAY and hopefully succeed more than I did lol


No comments:
Post a Comment